


TL;DR
There is a rich tradition of using wrist watches to mark special events, and I decided to revive this tradition for a PhD student who graduated from my lab. This posts details the process for anyone who is curious and/or would like to replicate it. Please do get in touch if you have any questions!
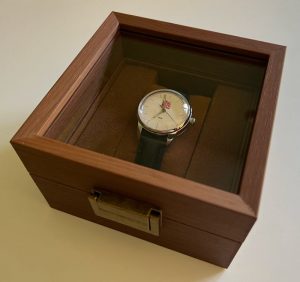
Figure 1. The final product in a presentation box.
Introduction
This is a bit of a weird one, because I typically use this website to cover scientific and academic topics, and to highlight the lab’s successes. However, it turns out that the celebrating success is actually compatible with one of my weird little hobbies: watch repair.
Historically, watches were used to mark significant milestones in one’s career. For example, it was common for employers to gift engraved watches in recognition of several decades of service, for families to gift them to their newly graduated children, or simply for people to buy them for themselves to mark a special event.
In my spare time, I like to tinker with vintage watches with an aim to repair them. (I do not recommend this hobby: it requires keen eyesight, expert manual dexterity, and a great deal of patience. I possess none of these skills, which makes it endlessly frustrating.) I had never built one before, but figured it would be a nice next step.
Methods
Materials
Watches are comprised of a case, movement, dial, and hands. To attach them to your wrist, a strap is also required. These materials can be sourced in a variety of places. In the United Kingdom, we are very fortunate to have local expertise. For example, Cousins UK is a wholesaler for watchmakers that sells tools, mechanisms, parts, hands, straps, and basically anything you could ever need. In addition, dialmaker.co.uk is a UK-based company that can print custom designs onto dials.
In this specific watch, I used a Seiko NH38 movement. This is a relatively straightforward movement in the sense that it is a classic “three-hander”: it tracks hours, minutes, and seconds; but has no further complications (i.e. no day, date, moonphase, etc). It also has the reputation of being a workhorse: it has an unpretentious finish but is solid and can run for many years without needing upkeep. The genuine article retails for about £100 at Cousins UK at the time of writing. (Non-Seiko copies of this movement can be obtained for much less, but their quality and make is less predictable.)
The case is a stainless steel housing with the diameter of a traditional dress watch: a modest 33 millimetres. This case also features a curved crystal, which is another common feature on dress watches. The backside of the case includes a flat crystal, a “display back” that will offer a view of the movement once installed. Cases usually come with a crown too.
A dial is not usually part of the case, and will have to be ordered separately. The same is true for the strap. Both of these should match the case size, so ensure you get a dial of a diameter that fits your case, and make sure that you get straps with a width that fits your case lugs.
Finally, hands need to be obtained. These can be bought separately, or typically also as a pair of hour and minute hands plus a separate second hand. Each hand has two sizes: its length needs to fit within the radius of the dial, and its diameter needs to fit snugly onto the mechanism. For the diameters, you can find the required sizes in the movement’s specifications. In the case of this NH38, the diameters are 1.5 mm for the hour, 0.9 mm for the minute, and 0.21 mm for the second hand.
The tools you’ll need are tweezers, wooden skewers, cutting pliers, a ruler, a felt-tip marker, and knife sharpener (or a similar tool to sand/file down metal). You can probably find these around the house. Additionally helpful tools could be hand installation tools (metal rods with plastic tips for pushing in hands), a vernier caliber (better for precise measurement than a ruler), a movement holder (highly recommended), and a rubber ball or case press to close the case (precise requirements depend on the case).
Procedure
Dial design and print
First, a dial needs to be designed and printed. You can do the design in your favourite software, and if you don’t have one yet, I can recommend the open-source GNU Image Processing Software more commonly known as “GIMP”. This is similar in function to Adobe Photoshop, but GIMP is free! (And arguably more ethically sourced…)
Dial printing is a fascinating art, but the hardware is costly and I would recommend you seek out a professional to do it for you. You should make sure that the dial you obtain fits your intended movement and case. The one used here was 28.5 mm in diameter.
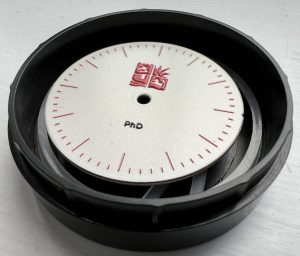
Figure 2. A printed dial in its original container.
Movement check
The movement comes pre-built. If you have a timegrapher (see Figure X for an example), it’s worthwhile to give it a quick test before you do anything else. If the movement turns out to be faulty, this allows you to return and replace it before wasting your time trying to use it.
Mounting the dial
Dials typically come with “dial feet”, which are metal sticks that come out of the back of the dial. Many custom-printed dials will come with four such feet, while many movements only allow for two. You’ll have to identify which of the feet are appropriate for your movement, and cut off the others. To do so, look at the front of your movement, and find two small holes. These are typically towards the edges of the movement, and on opposite sides (i.e. with 180 degrees in between them). Once you’ve identified these, align the dial such that it would be upright (i.e. with the crown at 3 o’clock on a typical left-wearing watch). Mark the excess dial feet with a felt tip pen. Next, do the same thing again to double-check that you have marked the correct feet, and only then cut the excess off. (If you make mistakes here, it’s hard to correct them without specialised equipment.)
Mounting hands
Ideally, you place the movement in a holder, so that it is firmly held in place. Positioning hands can be done with tweezers, and pushing them in with a hand installation tool (or you can use wooden skewers, especially if you’re careful and good with chopsticks). Pull out the crown so that the movement is in time-setting position. (If you are using a movement with a date complication, carefully adjust it all the way until you hear the date click so that the watch is set to midnight.) The hands can then be mounted by positioning the hour hand at 12 o’clock first, and carefully pressing it onto the post in the middle of the movement. Do so loosely at first, then check its alignment with the 12 marker, and press it firmly in when you’re satisfied with the alignment. Using the crown, set the time to e.g. 3 o’clock or another hour (align exactly with the marker). You can then set the minute hand in the same way as the hour hand, ensuring that it is aligned exactly with the 12 marker. Use the crown to adjust the time, e.g. to 06:15, ensuring exact alignment of the minute hand and a minute marker. Now gently place the seconds hand on top of the central peg, and then GENTLY press it in. (None of the hands should require much force, and the second hand less than the two other hands.)
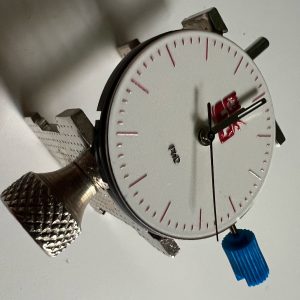
Figure 3. The watch movement is being kept in place in a movement holder. The dial and the hands are mounted in this photo.
If the second hand is long and the crystal is curved, it may be required to curve the second hand. You can do so with tweezers, by bending the outside of the hand. A bit of trial and error may be required to ensure that there is no contact between the second hand and the crystal, but also not between the second hand and the minute hand. Be gentle and careful, and try to get it perfect in one go. Obviously, this is hard, and in general it is better to try several small (and possibly insufficient) adjustments instead of bending it too far (having to bend it back makes for an uglier-looking hand). Allow yourself time, as it is easy to overdo this, but hard to fix once you have.
Casing the movement
After mounting the dial and hands, you can place the movement in a case. These have to be procured separately, and you should make sure that the case you buy fits the movement. Here, I use a case with a 33 mm outer diameter that is suitable for NH35 and NH38 movements. (This is typically advertised, as these movements are popular among watch customisers, but you should still check the case’s inside measurements as not all vendors advertise their NH compatibility correctly.)
Before placing the movement inside of its case, the crown will have to be released. This is usually done by gently pressing a button or lever (can be done with a wooden skewer) or partially unscrewing a screw (requires a tiny non-magnetic screwdriver) before gently pulling the crown away. This differs per movement, and the movement’s documentation will tell you how yours works. (You may have to find its manual online, as such knowledge is often assumed, so physical manuals are not typically supplied alongside movements.)
Make sure you’re careful when removing the crown. Pushing or unscrewing too far can make part of the keyless works fall out. At that point, you have a watch repair on your hands, which is much more complicated than any of this is and requires specialised tools.
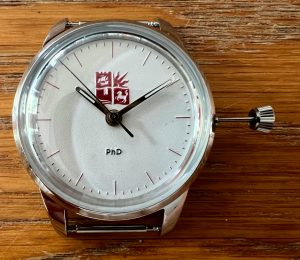
Figure 4. The movement is placed inside of its case, but the stem is too long.
Cutting the crown stem to size
The crown you remove first is typically a plastic-tipped one that comes with the movement. After this point, you can use the long threaded crown stem that is typically supplied with the movement. The crown itself is typically supplied with the watch case, so that they match. The problem is that the stem is too long, and will need to be cut to size and sanded down. Make sure it is perfectly flat, otherwise the crown will sit awkwardly.
After removing the crown, you can carefully place the movement inside the case, and align it with the crown hole. Stick the crown stem in so that the movement is in its running position. Now screw the crown onto the end of the stem. At this point, you’ll need to measure how long the excess crown stem is. The easiest way is to use a vernier caliper, but a ruler and a very steady hand could also make do. Remove the stem from the movement, unscrew the crown, and measure out the excess length from the crown-end of the crown stem. You can use a felt tip to mark it on the stem.
Once you’re sure of your measurements (feel free to do this a couple of times to get it right), you can cut the crown stem to size. It’s much better to under-cut than to over-cut, as you will need to procure a new stem if you over-cut. After cutting, you’ll need to sand down the end of the stem until it’s perfectly straight. (You can do so with a knife sharpener.) Repeat the above process until the crown fits perfectly.
Once the measurement is correct, you can use a tiny bit of superglue on the crown stem, and then screw on the crown. Make sure to allow it enough time to dry.
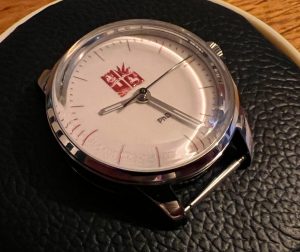
Figure 5. The watch after the crown has been cut to size.
Attaching the strap
The watch has two spring bars, between each set of lugs at 12 o’clock and 6 o’clock. These can be compressed, angled out, and then removed. There is specialised equipment for this, or you can just use your finger nails.
To attach the new strap, push the spring bar through its opening, put one side of the spring bar into the opening on the lug, and then push the other one into the strap as you move the strap in between the lugs. Again, this can be done with a specialised tool, your finger nails, or a flat but firm piece of plastic, wood, or metal.
Many modern straps will have quick-release spring bars that have a little lever. If yours do, then you can simply use the lever instead of messing about with a tool.
Results
The main result is a dress watch that looks nice and is personalised for the occasion of successfully surviving a PhD.
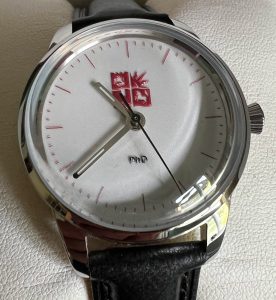
Figure 6. The final product!
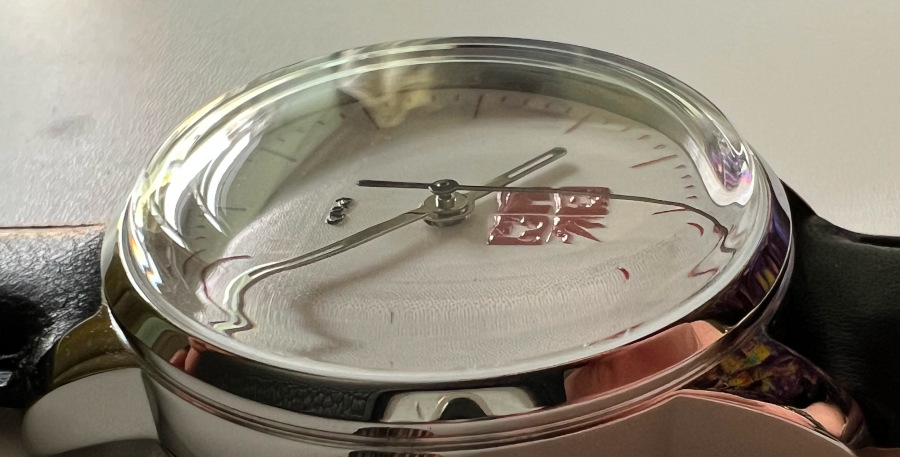
Figure 7. A side-view shows the textured dial and curved crystal.
Performance
The watch was tested after casing, and the timegrapher gives a good result. Pictured here is the dial-up position, which is common when watches are not on the wrist (e.g. overnight). Ideally, you should also test the crown-down position, which is common as people are walking or standing. Another helpful position for those with office jobs is a roughly 45-degree tilt towards 12 o’clock from dial-up, as this is a typical position while typing on a keyboard.
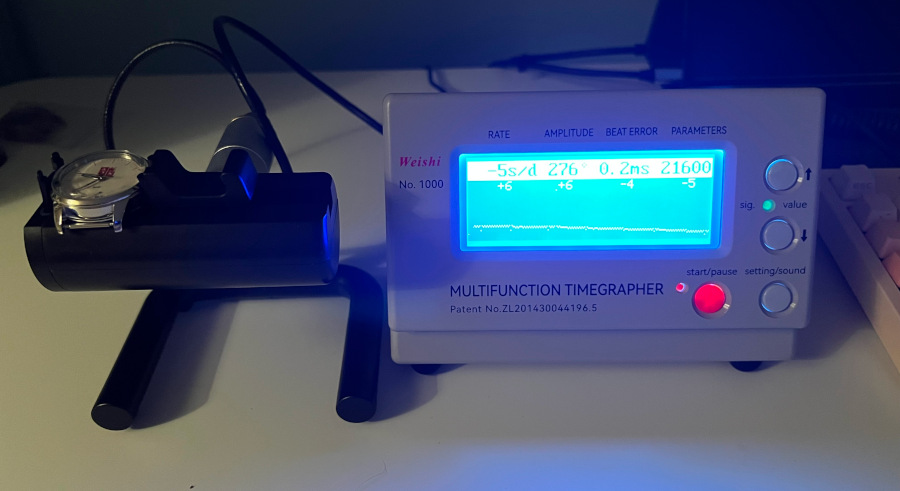
Figure 8. Watch on a timegrapher. The NH38 is usually listed with an accuracy within -20 to +40 seconds per day, so this average around +1 s/d is a decent score.
Discussion
A watch can be a physical celebration of academic achievement. Here, I demonstrate that an appropriate piece can be constructed by the enthusiastic amateur. This requires parts to be sourced from various manufacturers, wholesalers, resellers, and other professionals. Once obtained, parts need to be combined into a functional whole with the use of specialised tools (or alternatives that can be found in most kitchens or toolsets).
Limitations and future directions
The case used in the current design offers a display back. This is a wonderful window through which the movement can be viewed. I find this mesmerising, but the downside of Seiko’s NH-type movements is that their finish is relatively simple. This is part of their workhorse charm, but it makes them less suitable for a display back, which is typically used to showcase a fancy finish. In future projects, I may opt for a flashier movement.
Another limiting factor of the NH38 movement is its cost. This is worthwhile if the watch will be worn frequently, but not necessarily if it is only used as a show piece. Hence, future projects could opt for lower-cost options if the circumstances allow.